A fence fails slowly before it fails all at once. The leaning corner post, the loose gate latch, the section that rocks after a storm — all of it usually traces back to one decision made underground. Good fence post setting is not about dumping concrete in a hole and hoping for the best. It is about matching soil, drainage, post material, frost depth, and load before the fence ever shows above grade. Across American yards, from wet Ohio clay to dry Arizona caliche, the right method changes with the ground under your boots. That is why smart homeowners treat outdoor projects like part of a larger property plan, not weekend guesswork, and resources such as home improvement planning guides matter when you want work to last.
The honest truth is simple: posts do not rot because they touch dirt. They rot because water gets trapped where oxygen, wood fiber, and poor drainage meet. They do not lean because fences are weak. They lean because the ground moves, the hole was shallow, or the post had no path to shed pressure. Build for what the soil will do after the first winter, not what it looks like on installation day.
Fence Post Setting Choices Start Below the Surface
Most fence trouble begins with a hole that looks acceptable from above. The installer sees a post standing plumb, the homeowner sees progress, and everyone moves on. Six months later, the gate drags across the walkway because the soil had the last word. Underground work decides whether the fence ages quietly or becomes a yearly repair job.
Why Hole Depth Matters More Than Most People Think
Depth is not a decorative number. A shallow post behaves like a tent stake in a windstorm, especially when the fence carries solid panels. In many parts of the United States, a common rule is to bury at least one-third of the post length, but frost depth, wind exposure, and soil type can push that deeper.
A six-foot privacy fence in Kansas, for example, faces a different load than a short picket fence tucked behind a Georgia bungalow. Wide panels catch wind like a sail. When the post is too shallow, the pressure rocks the base back and forth until the soil loosens around it.
Frost adds another problem. In northern states, freeze-thaw cycles can lift poorly set posts over time. The ground swells, relaxes, and shifts in small movements that are easy to miss until the fence line looks tired. That is why checking local frost depth guidance before digging beats copying a method from a video filmed three climate zones away.
The Shape of the Hole Changes the Strength
A fence post hole should not look like a narrow pipe cut into the earth. Straight-sided holes can work in firm soil, but the bottom still needs enough width to resist movement. A hole that bells slightly at the base gives the footing more grip and helps keep the post from lifting in frost-prone ground.
Many bad installs come from using the smallest auger available. The post fits, the bag of mix fits, and the job looks efficient. Efficient is not the same as durable. A cramped hole leaves no room for proper backfill, drainage material, or a solid concrete collar where needed.
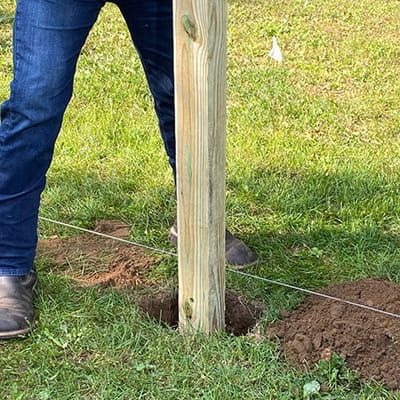
The cleanest installs also avoid disturbed soil around the top edge. Loose, crumbling soil near the surface invites wobble after rain. Dig clean, remove organic matter, and keep the sides stable. The post starts gaining strength before the first shovel of backfill lands.
Concrete Is Useful, But It Is Not Magic
Concrete has a strong reputation because it feels permanent. It hardens, it grips, and it makes the post feel secure on day one. Still, concrete can trap water if the base is wrong, and that trapped moisture can punish wood faster than plain soil ever would. The trick is knowing when concrete helps and when it hides a problem.
When Concrete Fence Posts Need Drainage Support
Concrete fence posts and wood posts set in concrete both need the same basic respect: water needs somewhere to go. When wet soil pushes moisture against a post base with no escape path, the footing becomes a cup. That cup may sit underground for years, quietly feeding decay around the most stressed part of the post.
A proper gravel base can change that story. A few inches of compacted gravel at the bottom of the hole lets water move below the post instead of sitting against it. This matters most in clay-heavy yards, low areas near downspouts, and fence runs along slopes where runoff naturally collects.
The top of the concrete also needs shape. A flat surface around a wood post invites water to sit right at the collar. A slight crown that slopes away from the post sheds rain before it can soak the grain. Small detail, big payoff.
Dry Pack, Wet Mix, and the Mistake of Speed
Fast-setting products tempt people because they promise progress without mixing. Pour dry material in the hole, add water, and move to the next post. That can work for some light-duty fence sections, but it is not a free pass to ignore alignment, moisture, or tamping.
Wet mixing gives more control. The concrete fills voids better, wraps the post more evenly, and cures with fewer dry pockets. For gate posts, corner posts, and long privacy runs, control matters. A rushed dry pour can leave weak zones you will not see until the post starts shifting under load.
Speed also causes alignment mistakes. Posts must stay braced while material sets. A post that moves half an inch during curing may still look fine from the street, but that small tilt becomes obvious once rails and panels line up across the run. The ground forgives nothing. It records every shortcut.
Gravel, Soil, and Hybrid Methods Earn Their Place
Concrete gets most of the attention, but it is not the only answer. Some fences last longer because the installer used packed gravel, tamped soil, or a hybrid system matched to the post and site. The best method is the one that manages water and movement, not the one that sounds strongest at the hardware store.
Where a Gravel Drainage Base Beats a Solid Footing
A gravel drainage base works because it gives water a path away from the post. That sounds too simple, which may be why people skip it. Yet on wood posts, especially pressure-treated pine or cedar, the base of the post is where rot pressure concentrates.
In a wet Pacific Northwest yard, gravel under and around the lower portion of the post can keep moisture from sitting against one spot. The post still needs proper depth and tight compaction, but drainage reduces the slow soak that causes early failure. Concrete may still be used above the gravel, but the bottom should not become a sealed bowl.
Gravel-only setting can also work for certain agricultural, rail, or lighter decorative fences when tamped in thin layers. The key phrase is thin layers. Dumping gravel in at once and poking it with a shovel is not compaction. Real compaction means adding material gradually and tamping until the post feels locked in place.
Tamped Soil Still Works in the Right Ground
Tamped soil has an old-fashioned reputation, but old does not mean weak. In dense, well-draining soil, tightly packed native earth can hold posts for years, especially for split rail, farm fencing, or low-load lines. It also lets moisture move more naturally than concrete around wood.
The method fails when people use loose fill, topsoil, or muddy spoil from the hole. Organic soil shrinks as it breaks down. Wet clay smears and later cracks. Sandy soil may drain well but needs careful compaction to avoid shifting. Native backfill only works when the native ground has enough structure to hold pressure.
A hybrid method often makes sense for homeowners who want both drainage and strength. Gravel goes at the bottom, the post is set plumb, tamped gravel or soil stabilizes the lower zone, and concrete supports the upper portion where lateral force is highest. That approach costs a little more attention, not much more money.
Post Material, Treatment, and Hardware Decide the Long Game
A strong hole cannot rescue the wrong post forever. Material choice, cut ends, fasteners, and gate hardware all affect how the fence ages. The post is not a single part of the fence. It is the part that receives every pull, push, slam, and seasonal movement from everything attached to it.
Fighting Wood Post Rot Before It Starts
Wood post rot usually begins where moisture lingers near the soil line. That zone gets wet, dries slowly, and carries a heavy load. Even pressure-treated lumber can fail early when cut ends are left untreated or the post sits in a poorly drained pocket.
Cut ends deserve extra care. Field cuts expose untreated interior wood, so an end-cut preservative should go on before the post enters the hole. This step feels minor during installation, but it often separates a fence that lasts from one that softens at the base after a few hard seasons.
Post orientation also matters. Some installers set the factory-treated end down when possible, because that portion often has better treatment penetration. Others rely on post caps, sloped concrete collars, and careful drainage to reduce water entry from above and below. The goal never changes: keep water moving away instead of letting it settle into the post.
Gates Need Stronger Posts Than Fence Runs
A gate post is not the same as a line post. It carries hanging weight, swing force, latch pressure, and the repeated shock of daily use. A post that would hold a panel without complaint may fail quickly when asked to support a wide driveway gate.
For a backyard gate in Texas or Florida, where families may use it several times a day, bigger posts and deeper footings are not overbuilding. They are common sense. A 4×4 may work for a small pedestrian gate, but wider or heavier gates often need 6×6 posts, stronger hinges, and more substantial footings.
Hardware should match the load too. Cheap hinges sag, screws pull, and latch alignment changes as the post moves. Through-bolts, exterior-rated fasteners, and adjustable hinges give the post system a better chance to stay square. The strongest underground work still needs above-ground hardware that respects the same forces.
Installation Habits That Keep the Fence Straight for Years
The method matters, but the work habits matter too. A durable fence comes from checking small things before they become permanent. String lines, bracing, curing time, and drainage grade do not look dramatic in photos. They are the quiet reason the fence still looks sharp years later.
Setting Fence Posts Plumb Is Only the First Check
Setting fence posts plumb is the easy part. Keeping the whole run straight is harder because each post affects the next one. A post can be perfectly vertical and still sit out of line, creating a fence that waves when viewed from the end.
A tight string line gives the installer a reference that the eye cannot beat. Posts should be checked from multiple angles, not only from the side where the work feels convenient. This matters on sloped yards, where the fence line can trick the eye into accepting a crooked layout.
Bracing should stay in place long enough for the setting material to gain strength. Removing supports early may save space on the job site, but it risks small movement at the worst possible time. Once rails go up, those small shifts become built into the fence.
Water Management Around the Finished Fence
The job is not finished when the last panel goes in. Soil grading around the posts affects how the fence performs every time it rains. If mulch, soil, or landscape edging traps water against the post bases, even a careful installation can suffer.
Homeowners often create this problem after the contractor leaves. They add flower beds along the fence, pile mulch high for a cleaner look, or route irrigation too close to the posts. The fence looked good, so they forget the underground system still needs air and drainage.
A better habit is to keep the base visible and slightly clear. Let water drain away from posts, avoid burying collars under mulch, and inspect gate posts after storms. The fence will tell you early when something is wrong. A slight wiggle, a latch that catches, or a panel that pulls out of square is a warning, not a cosmetic issue.
Conclusion
A fence that stands for years is not built by luck. It is built by people who respect soil, water, depth, and load before they think about panels. The prettiest fence in the neighborhood can still fail early if the posts sit in wet pockets, shallow holes, or weak backfill. The plain-looking one with smart drainage and braced posts may outlast it by a decade.
Good fence post setting asks you to slow down where most projects speed up. Dig deeper than convenience suggests. Use gravel where water needs an exit. Shape concrete so rain moves away. Treat cut wood. Give gate posts the strength they deserve. These choices hide underground, but they show up every year the fence stays straight.
Before you install or repair your next fence, walk the line after rain and study the soil. The ground will tell you what method it needs, and listening before you build is the cheapest strength you can buy.
Frequently Asked Questions
What is the best way to set fence posts for long life?
The best method depends on soil, climate, post material, and fence load. Most long-lasting installs use proper depth, a gravel base for drainage, careful alignment, and concrete where extra lateral strength is needed. Gate and corner posts usually need the strongest footings.
Should fence posts be set in concrete or gravel?
Concrete gives strong lateral support, while gravel improves drainage around the post base. Many durable wood fence installs use both: gravel at the bottom and concrete above it. Gravel-only methods can work for lighter fences in firm, well-draining soil.
How deep should fence post holes be in the United States?
A common starting point is burying one-third of the post length, but local frost depth and wind exposure matter. A six-foot privacy fence often needs deeper support than a short decorative fence. Always check local building guidance before digging.
Why do wooden fence posts rot at ground level?
Moisture collects near the soil line, where the post has limited airflow and steady exposure to wet conditions. Poor drainage, flat concrete collars, untreated cut ends, and buried mulch make the problem worse. Keeping water moving away slows decay.
Do gate posts need to be larger than regular fence posts?
Gate posts often need larger dimensions because they carry hanging weight and repeated movement. A small walk gate may work with standard posts, but wide gates often need 6×6 posts, deeper footings, stronger hinges, and better bracing.
Can I set fence posts without concrete?
Yes, but the soil and fence type must support that choice. Tamped gravel or native soil can work for lighter fences in stable, well-draining ground. Heavy privacy fences, corner posts, and gate posts usually perform better with concrete support.
How long should concrete cure before attaching fence panels?
Concrete should gain enough strength before rails and panels add stress to the post. Many installers wait at least 24 to 48 hours for lighter work, while heavier gates or panels may need longer. Weather, mix type, and moisture affect curing time.
What causes fence posts to lean after installation?
Leaning usually comes from shallow holes, loose backfill, poor compaction, wet soil movement, frost heave, or wind pressure on solid panels. Gate posts may lean when the footing is undersized for the load. Early movement should be corrected before rails distort.